If you’re here, it’s likely that at least once you’ve found yourself wanting to start studying Malware Analysis, but without knowing how to build a secure environment that wouldn’t put you—or worse, your company—at risk.
In the following guide, we’ll look at how to build an ideal first sandbox that can help you start this career.
First, you’ll need software to create virtual machines (from now on referred to as VMs) and a Windows ISO.
As VM creation and management software, this guide will use VirtualBox, but if you prefer to use VMware, the initial steps will be slightly different but easily adaptable. If you already have a Windows VM or don’t need a guide to create one, feel free to skip to step two: Install Flare-VM by Mandiant.
Download ISO and Create VM
After installing VirtualBox, available at the following link, proceed to obtain the Windows ISO.
The first step is to download Microsoft’s MediaCreationTool at this link.
Once downloaded and launched, after accepting the terms, you’ll be able to choose what you want to do. Select the option to create installation media for another PC:
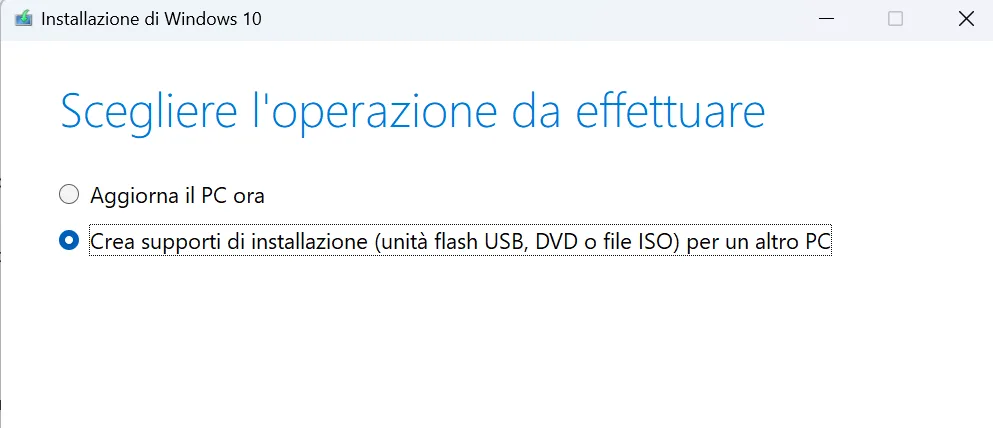
After selecting your preferred version of Windows—we recommend Windows 10 64-bit—proceed to the final page where you’ll choose how to download it; select the ISO file option.
Once you select where to save the image, the download will begin automatically.
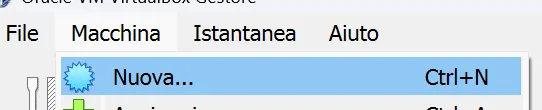
Now just open VirtualBox and from the “Machine” menu, select New:
In the window that appears, you can name your VM, select the Windows version you want to install (we recommend Windows 10 PRO), modify the default VirtualBox user and password (defaults are vboxuser and changeme), add Guest Additions (which allow full-screen mode), and finally choose the hardware to allocate to the VM.
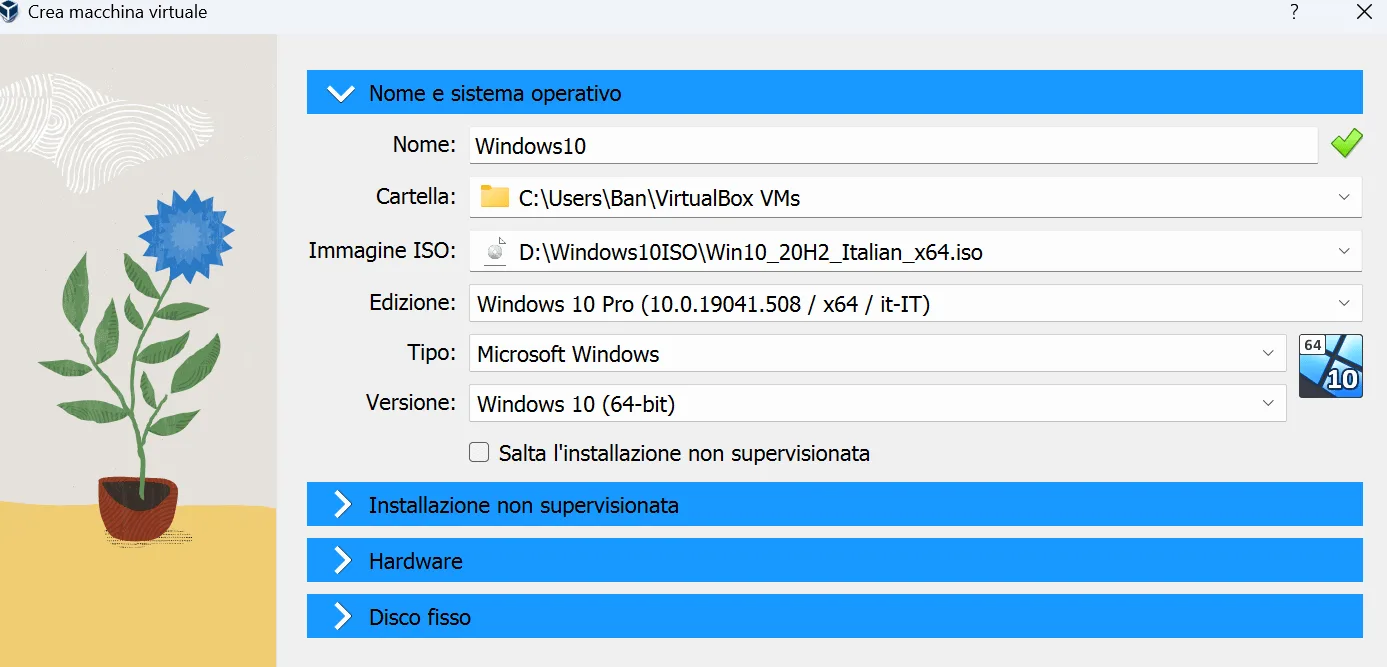
As for RAM and CPUs, choose based on your PC’s capabilities, but to avoid performance issues we recommend at least 4GB of RAM and 4 CPUs.
For the hard disk, leave the default settings but select at least 80GB (this is the minimum required to install Flare-VM):
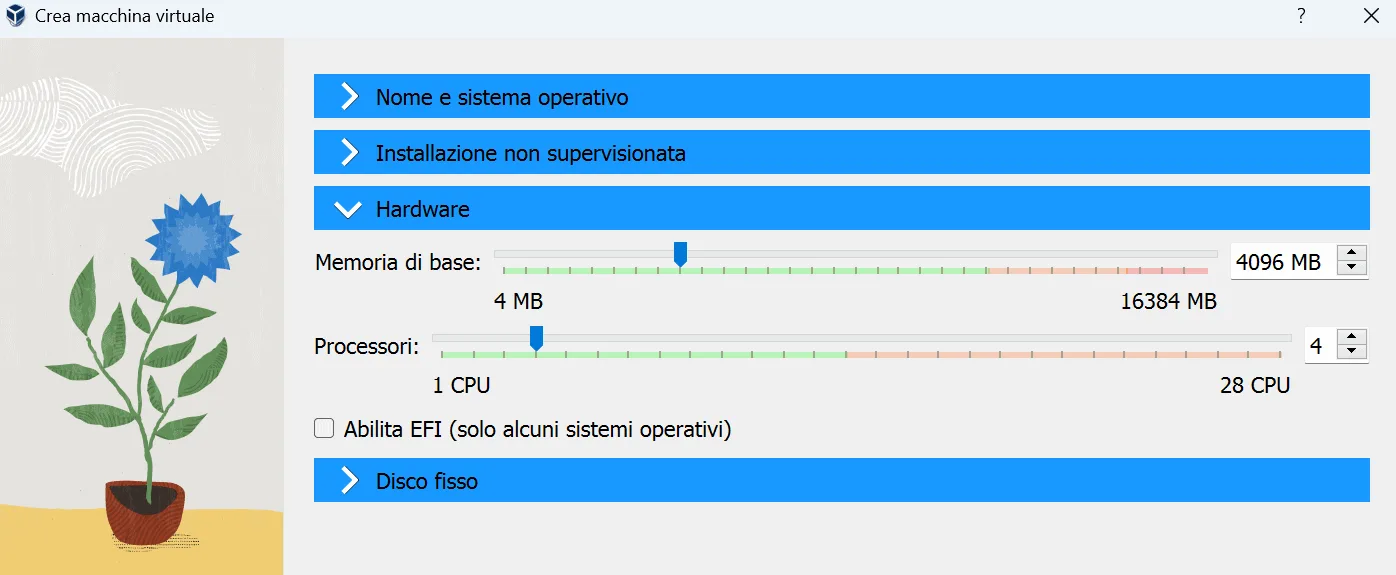
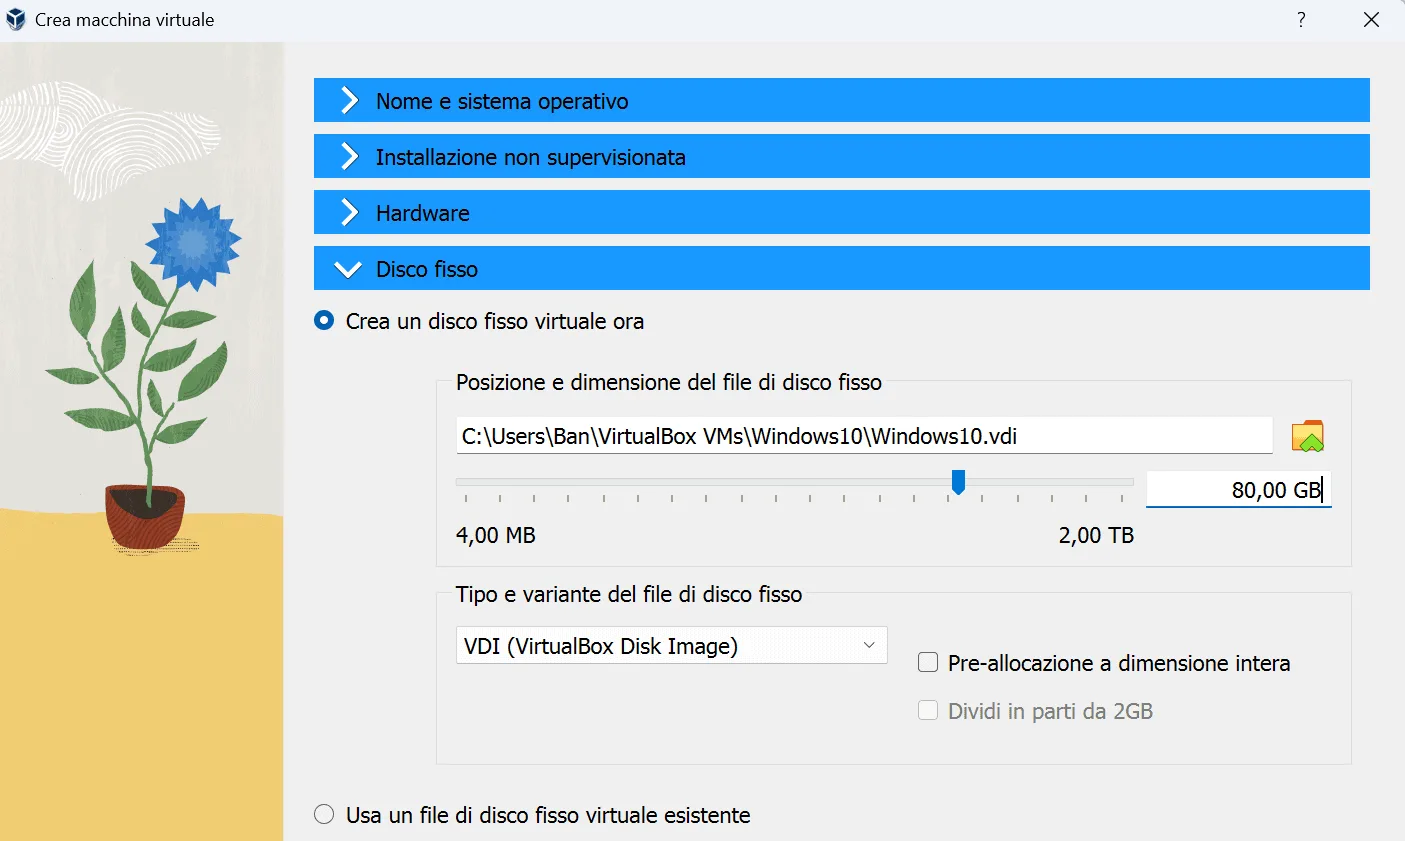
Once the installation is complete, we can proceed to configure the environment to install Flare-VM.
Install Flare-VM
Before installing Flare-VM, there are 3 required steps to ensure the installation completes successfully.
Step 1: Disable Anti-Tampering (Tamper Protection)
Go to:
“Windows Security” → “Virus & threat protection” → under “Virus & threat protection settings” select “Manage settings” → locate “Tamper protection” and turn it off.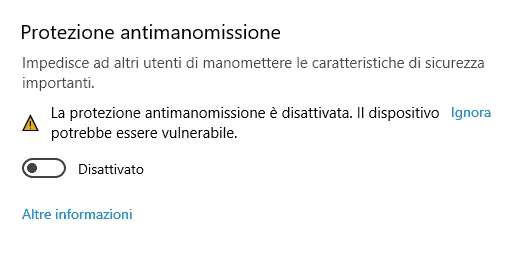
Step 2: Disable Windows Automatic Updates
Go to “Settings” → “Update & Security” → “Pause updates for 7 days”.Step 3: Disable Windows Defender
In the search bar, type gpedit.msc, then navigate to:
“Computer Configuration” → “Administrative Templates” → “Windows Components” → “Microsoft Defender Antivirus” → Disable Defender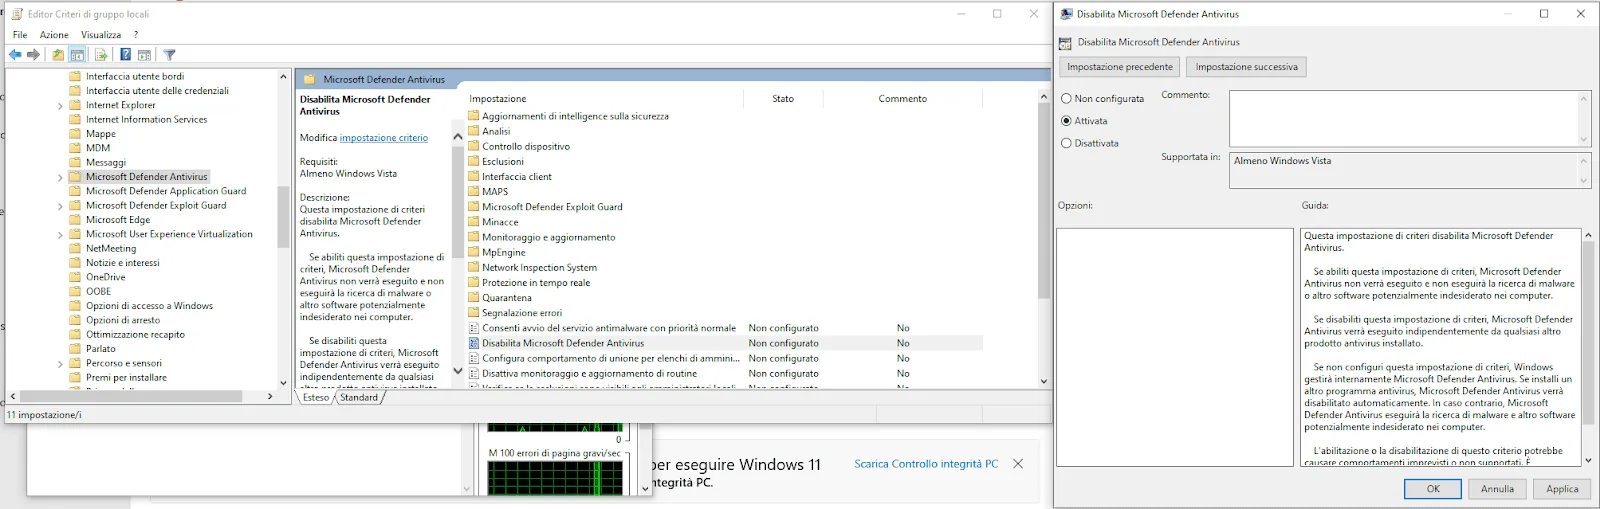
Still in the same path, go a step further and find “Real-time Protection” and disable that too:
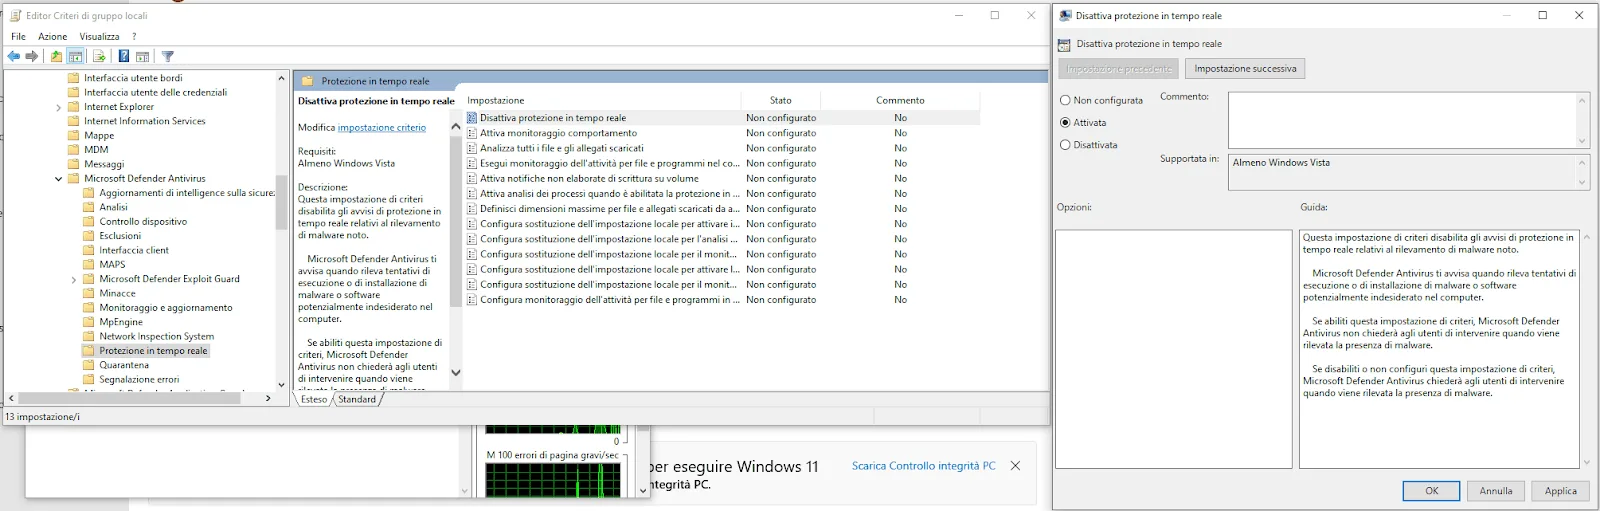
Now all steps are complete. Restart the VM to apply the changes.
After rebooting, take a snapshot of the virtual machine. This is because Flare-VM may fail to install correctly, and having a snapshot allows you to restore the machine to just before installation. The installation process from this point is very simple. Open a PowerShell window as Administrator and follow the steps provided on Flare-VM’s GitHub page:
- (New-Object net.webclient).DownloadFile('[https://raw.githubusercontent.com/mandiant/flare-vm/main/install.ps1',"$(\\[Environment\]::GetFolderPath('Desktop'))\\install.ps1](https://raw.githubusercontent.com/mandiant/flare-vm/main/install.ps1',"$(\[Environment\]::GetFolderPath('Desktop'))\\install.ps1)")
- cd C:\Users<Username>\Desktop
- Unblock-File .\install.ps1
- Set-ExecutionPolicy Unrestricted
- .\install.ps1 (or use .\install.ps1 -password <VM user password> if needed)
Shortly after starting the installation, you’ll be asked whether to integrate plugins. Note that the more plugins you include, the longer it will take (and it’s already slow). We recommend leaving everything as default. You can install additional plugins later if needed.
Now grab a coffee and be patient—once finished, the first part of your setup is ready.
The Linux Distro for Malware Analysis: Remnux
Remnux is a Linux distro designed primarily for malware analysis. Not only is it a great product, but since you’ll need a Linux VM during your Malware Analysis career, we’ve chosen this distro for its ease of installation and the tools it already includes.
Installing it is very simple:
Go to the official website and download the distro.
After downloading, go to the “Machine” menu in VirtualBox and select “Add”—and voilà, you’re done.
Now you can start Remnux.
Simulated Environment Setup for Malware Analysis
The goal of creating a separate and secure environment—comparable to a sandbox—is to make it impossible for the malware to cause damage or "see" your network/data.
For static analysis, a Flare-VM with some tweaks is usually enough. But when performing dynamic analysis, it’s critical to ensure the malware cannot contact devices on your home or corporate network—especially when analyzing unknown samples.
The approach described below is ideal for getting started. We’ll now see how to create a network physically isolated from your home network, with proper Internet Simulation.
First, open VirtualBox and click on the “Tools” tab.
Here, you have the option to create a new network interface. Do so, and choose an IP range different from your home network to avoid confusion.
(To check your private IP, run ipconfig in CMD):
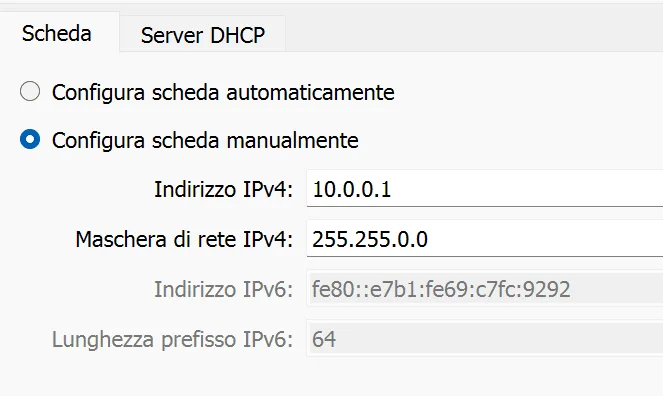
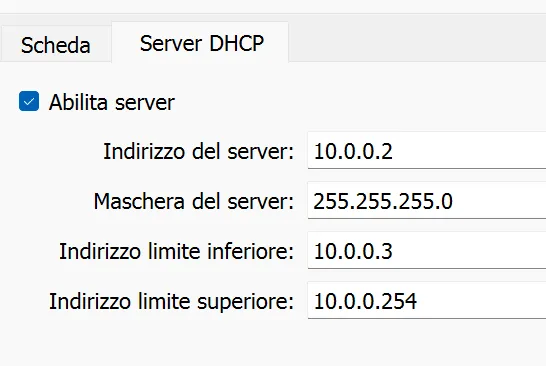
This is an example of how you can configure this new network interface. Now go to the settings of the two VMs previously created (Remnux and Flare), and under the "Network" section, select the interface you just created:
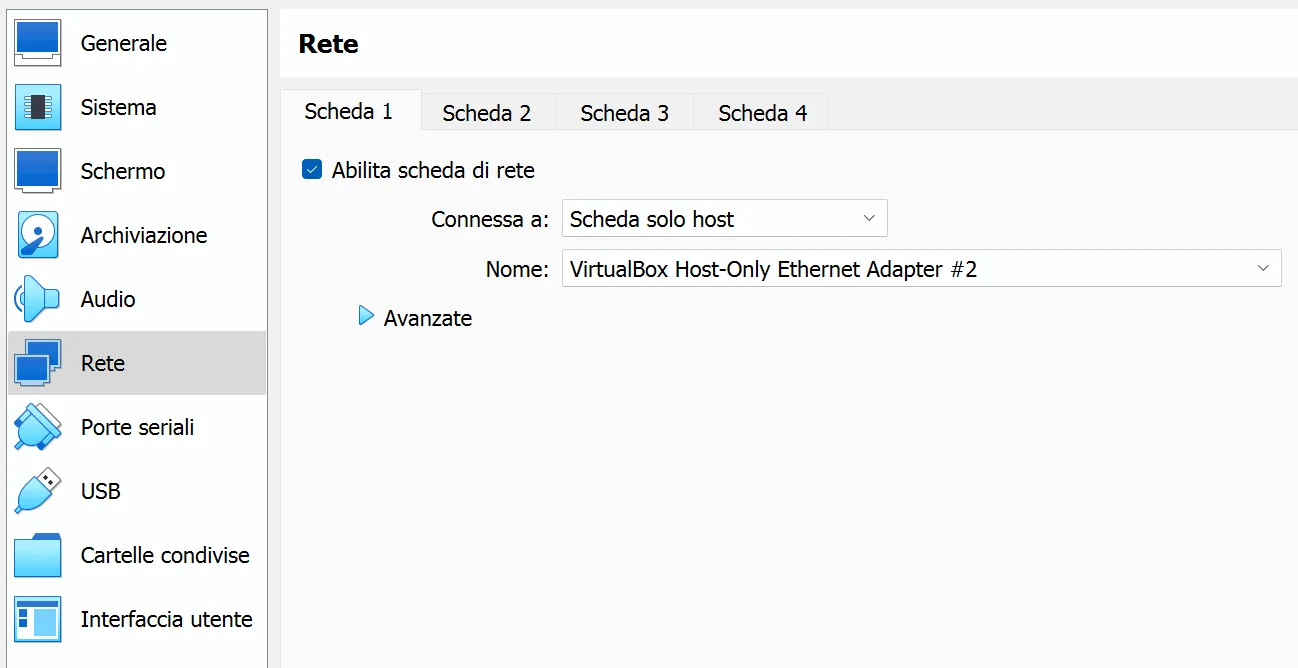
Now, after making sure no other network adapters are connected, proceed by starting both VMs to set up INetSim.
Start with the Remnux VM
Open a terminal and run the following command to edit the INetSim configuration file:
sudo nano /etc/inetsim/inetsim.conf
Now the configuration file will be open. Scroll down a few lines until you find the commented line #start_service dns; remove the # to enable this functionality.
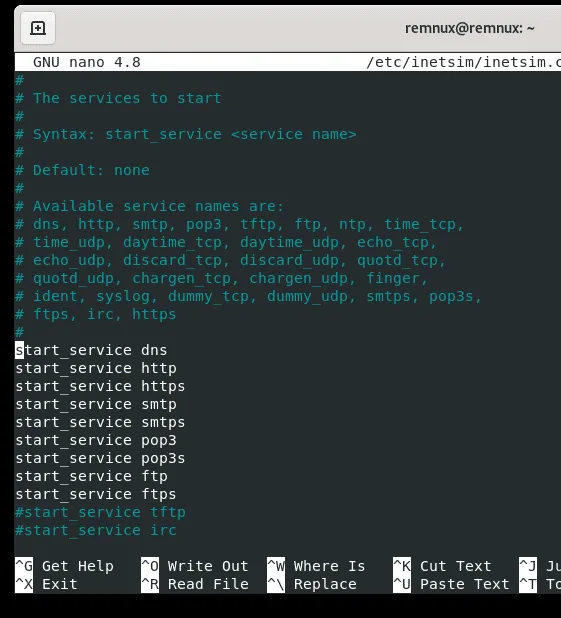
Next, scroll to find:
service_bind_address 10.10.10.1
Replace the IP with 0.0.0.0, which is shorthand for “bind to all interfaces”:
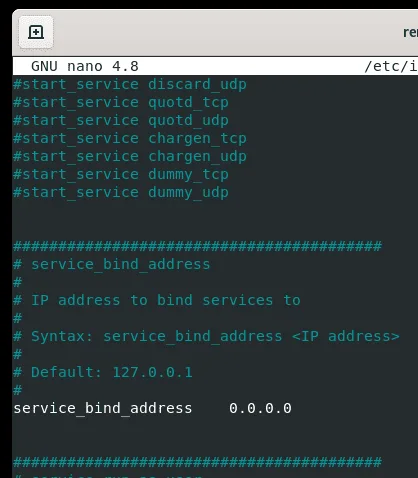
Now scroll down until you find:
dns_default_ip 10.10.10.1
In this case, the IP must be replaced with the IP of the Remnux machine, which you can find by opening another terminal and typing:
ip a
You’ll find the machine’s IP next to the inet entry.
If you configured the network adapters like we did, the IP of Remnux is most likely 10.0.0.3:
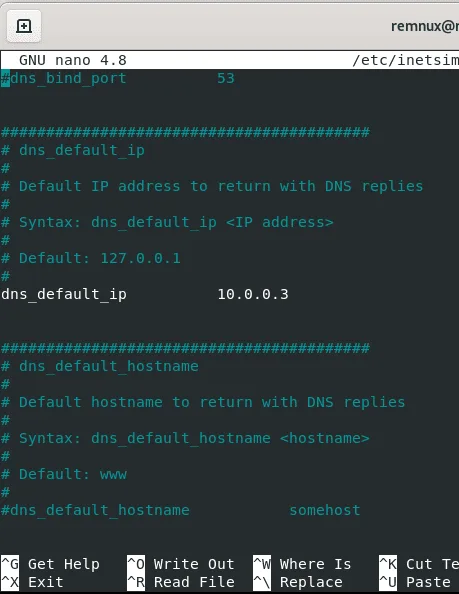
With this last step, we’ve finished configuring the Remnux machine. Now switch to Flare to allow communication between them.
On the Flare VM
Go to “View network connections”, right-click on your interface, and select Properties.
Then, double-click on “Internet Protocol Version 4”, and under the Preferred DNS server, enter the IP of the Remnux machine.
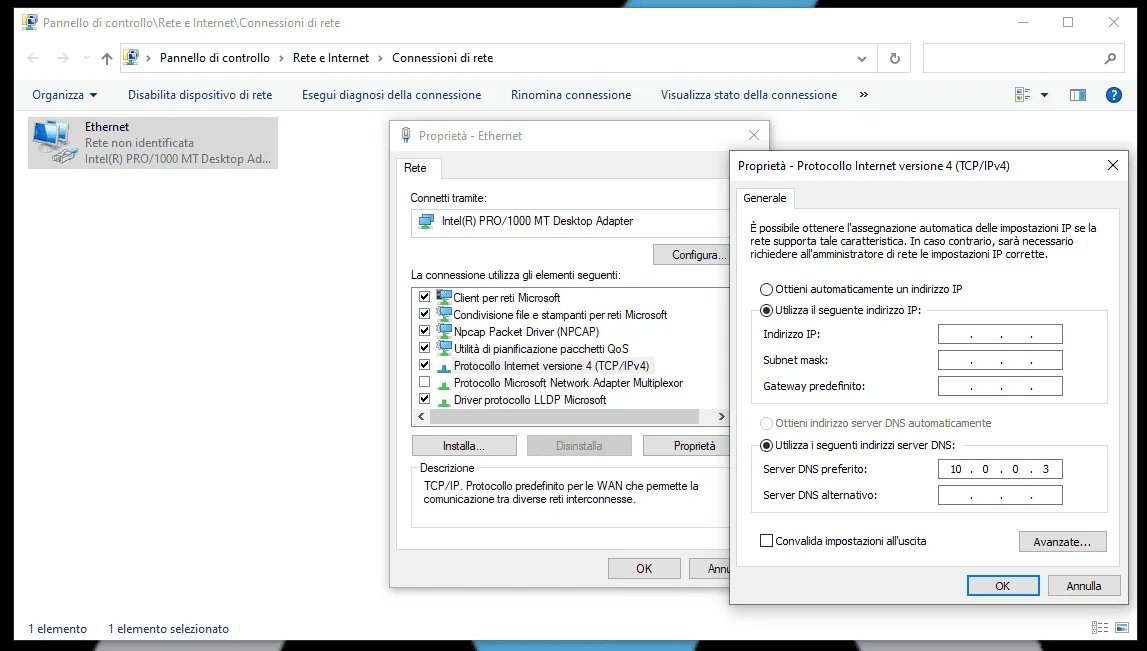
Now it’s time to test everything. Go to the Remnux VM, open a terminal, and type:
inetsim
You should now see your Internet simulation service start.
Next, go back to the Flare VM, open Chrome, and type a random website such as wikipedia.com.
If everything is set up correctly, you won’t see Wikipedia—but instead this page:

In this case—congratulations.
You’ve just successfully configured your first malware analysis environment.
Conclusions: Two Notes on INetSim
INetSim is, as the name suggests, a simulation. This means that malware will never actually contact its real C2 (Command & Control server). So the natural question is: what is the purpose of such an environment?
The answer is that this is a basic environment, and in another article we’ll explain how to build a more advanced one. But for 90% of study cases, this environment is ideal because there is absolutely no risk, making it perfect for beginners in this field.
Secondly, INetSim will always return a 200 status code for any request. This means that when you run malware that pings its C2 to decide whether to execute or not, the connection will succeed—and the malware will not realize that it's in an environment with no real internet connection.
But that’s not all—there’s another very useful feature of INetSim, related to all those samples that attempt to download a second stage. INetSim will return a 200 for that request too (which allows you to analyze malware whose C2 has been moved or temporarily taken down), and it will generate a fake second-stage file, saving it exactly in the location requested by the malware. This allows for deeper analysis of the malware’s behavior.